※当記事ではCSS編集については触れません。
※テーマは「Dawn」を使用しています。
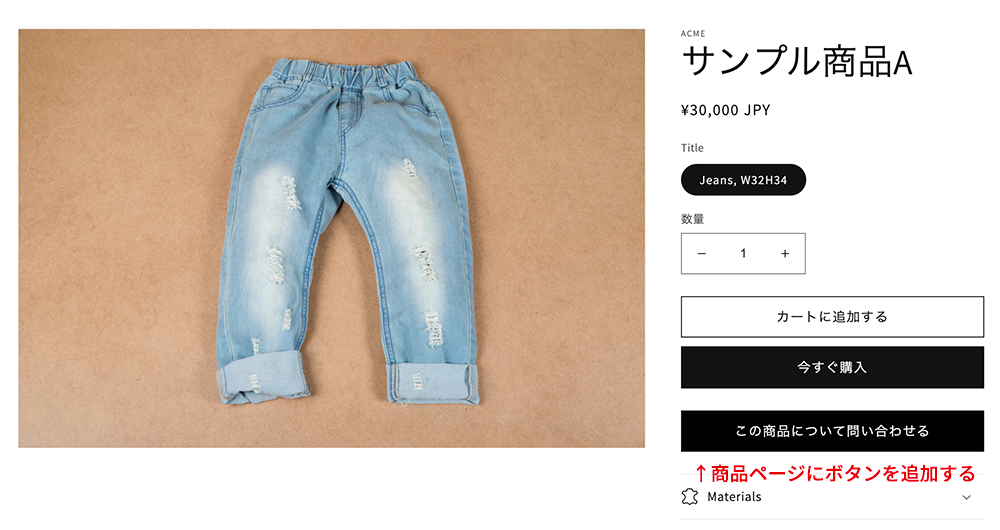
完成イメージ
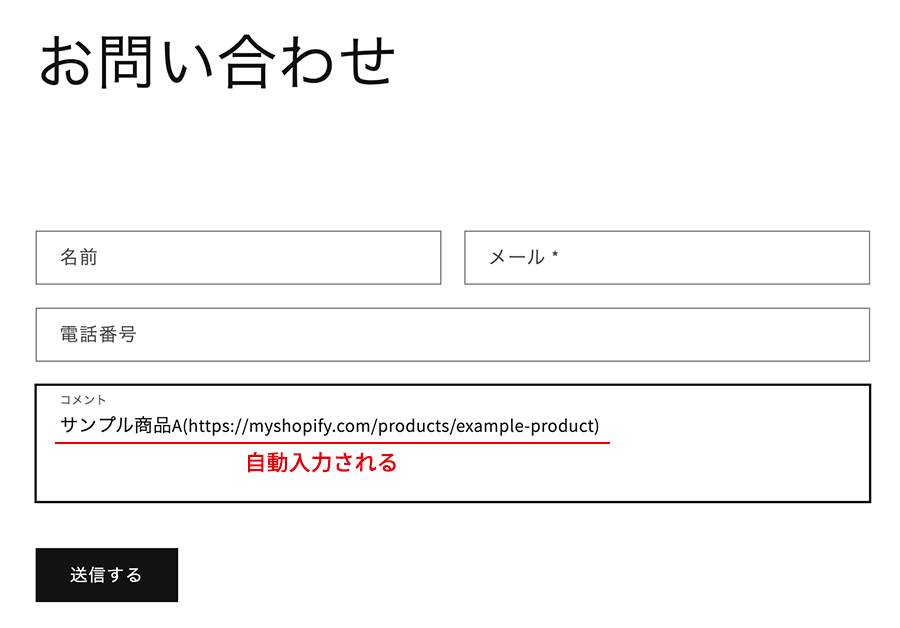
商品ページの「この商品について問い合わせる」ボタンを押すと、お問い合わせページに遷移。その際、商品名とURLを自動でテキストエリアに反映させるカスタマイズです。
設定方法
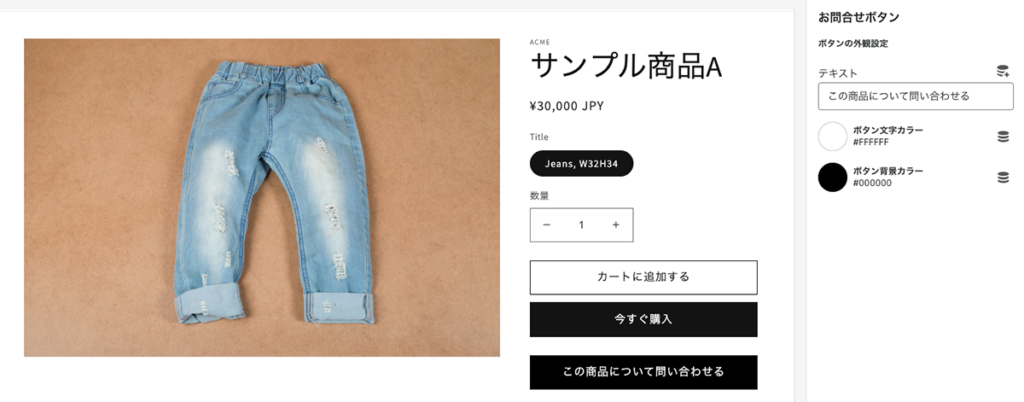
①商品ページにボタンを設置
Section > main-product.liquid(商品ページ) の、{% case %}{% endcase %}の間に以下のコードを入力します。
※パラメーターは product_id としています(任意)。
{%- when 'inquiry' -%}
<div class="inquiry_btn">
  <a href="{{ routes.root_url }}pages/contact?product_id={{ product.title }}({{ canonical_url }})" class="button button--full-width" style="background: {{ block.settings.color_btnBk }}; color: {{ block.settings.color_btnTxt }};" target="_blank">{{ block.settings.btn_txt }}</a>
</div>
Schema には、以下を入力します。
※{“type”: “rating”, 〜} セクションの下に追加すると良いと思います。
{
      "type": "rating",
      "name": "t:sections.main-product.blocks.rating.name",
      "limit": 1,
      "settings": [
        {
          "type": "paragraph",
          "content": "t:sections.main-product.blocks.rating.settings.paragraph.content"
        }
      ]
    }, //←カンマ忘れずに

//ここから追加
{
      "type": "inquiry",
      "name": "お問合せボタン",
      "limit": 1,
      "settings": [
        {
          "type": "header",
          "content": "ボタンの外観設定"
        },
        {
          "type": "text",
          "id": "btn_txt",
          "label": "テキスト",
          "default": "この商品について問い合わせる"
        },
        {
          "type": "color",
          "id": "color_btnTxt",
          "label": "ボタン文字カラー",
          "default": "#fff"
        },
        {
          "type": "color",
          "id": "color_btnBk",
          "label": "ボタン背景カラー",
          "default": "#000"
        }
      ]
    }
//ここまで追加
②お問い合わせページにJavaScriptを追加
Section > contact-form.liquid(お問い合わせページ)に以下を挿入。{% schema %} の上だと良いと思います。
※以下は旧版です。
//jQueryを読み込んでおく
<script src="https://code.jquery.com/jquery-3.6.1.min.js" integrity="sha256-o88AwQnZB+VDvE9tvIXrMQaPlFFSUTR+nldQm1LuPXQ=" crossorigin="anonymous"></script>

<script>
$(function(){
  if(document.URL.match(/\?/)) { // URLパラメータが存在する場合処理を行う
    // URLを取得し、「?」で分割
    const url = location.href;
    const urlArray = url.split('?');
    // パラメータ用の配列を用意
    const paramArray = [];
    const paramData = urlArray[1].split('=');
    // パラメータのキーをparamArrayにpushし、
    // parramArray[(キー名)]にパラメータ値をセット
    paramArray.push(paramData[0]);
    paramArray[paramData[0]] = paramData[1];
    // 値を取得。①で設定したパラメーター product_id と合わせる。
    const text = decodeURI(paramArray['product_id']);
    if(text!='undefined') { // パラメータの値が存在する場合に処理を行う
      //textareaの id="ContactForm-body" に合わせる
      $('#ContactForm-body').val(text);
    }
  }
});
</script>
2023年9月追記
(新版)コード内容を修正しました、さまざまな条件が発生した場合でも問題なく使用できると思います。↓
//jQueryを読み込んでおく
<script src="https://code.jquery.com/jquery-3.6.1.min.js" integrity="sha256-o88AwQnZB+VDvE9tvIXrMQaPlFFSUTR+nldQm1LuPXQ=" crossorigin="anonymous"></script>

<script>
$(function() {
  // URLのパラメータをオブジェクトとして取得する
  function getUrlParams(url) {
      let params = {};
      (url + '&').split('?')[1].split('&').forEach(param => {
          let [key, value] = param.split('=');
          try {
              if (key) {
                  params[decodeURIComponent(key)] = decodeURIComponent(value || '');
              }
          } catch (e) {
              // 不正なURLエンコードを検出した場合は、そのパラメータを無視
              console.warn("Error decoding URL parameter:", param);
          }
      });
      return params;
  }
  const params = getUrlParams(location.href);
  const productId = params['product_id'];
  if (productId && productId !== 'undefined') {
      $('#ContactForm-body').val(productId);
  }
});
</script>
試してみる
・通常のお問い合わせページURL

・商品ページのお問い合わせボタンを押して遷移した場合のURL

【参考】
URLパラメーターから取得した内容をそのままテキストボックス上に反映する
[Shopify]各商品ページにその商品についてのお問合せフォームをモーダルで表示(Dawn)56/100